DIY Banner Cake Topper
Planning your child's birthday is one of the most fun things you can do, especially if it is your child's first birthday. You pick a theme and you plan for months and months with all sorts of fun ideas and Pinterest worthy crafts that you can cook up yourself.
Then you start adding all of those costs together and realize that planning a birthday party isn't the cheapest thing (especially if you're crafting up Pinterest worthy thing-a-ma-bobs). One of the biggest costs of a birthday party is the cake (depends on just how fancy of a cake you want). Many mamas enjoy doing the beautiful two tiered fancy, dancy cakes these days that cost an arm and a leg.
Me?
Yes, I wanted a fancy, dancy two tiered cake too.
With additional costs for cake toppers, special fillings and fondant thing-a-ma-bobs, your cake bill can quickly add up.
So, enter the homemade cake topper. These little cake bunting toppers and tassel toppers are all over Etsy, Zulily and Pinterest. It's the "new" thing. However, this new trend isn't so cheap. Most of these precious cake toppers cost roughly anywhere from $10-25 with shipping.
As I sat staring at my computer this morning think, "crap that's expensive," and after talking to a bakery that was going to charge me $15 to make this for me, I decided that I could do this. As it turns out, I had left over material from a scrap banner that I made for Little Bug's birthday party (tutorial to come soon) and I also happened to have a big ole' pack of cooking skewers.
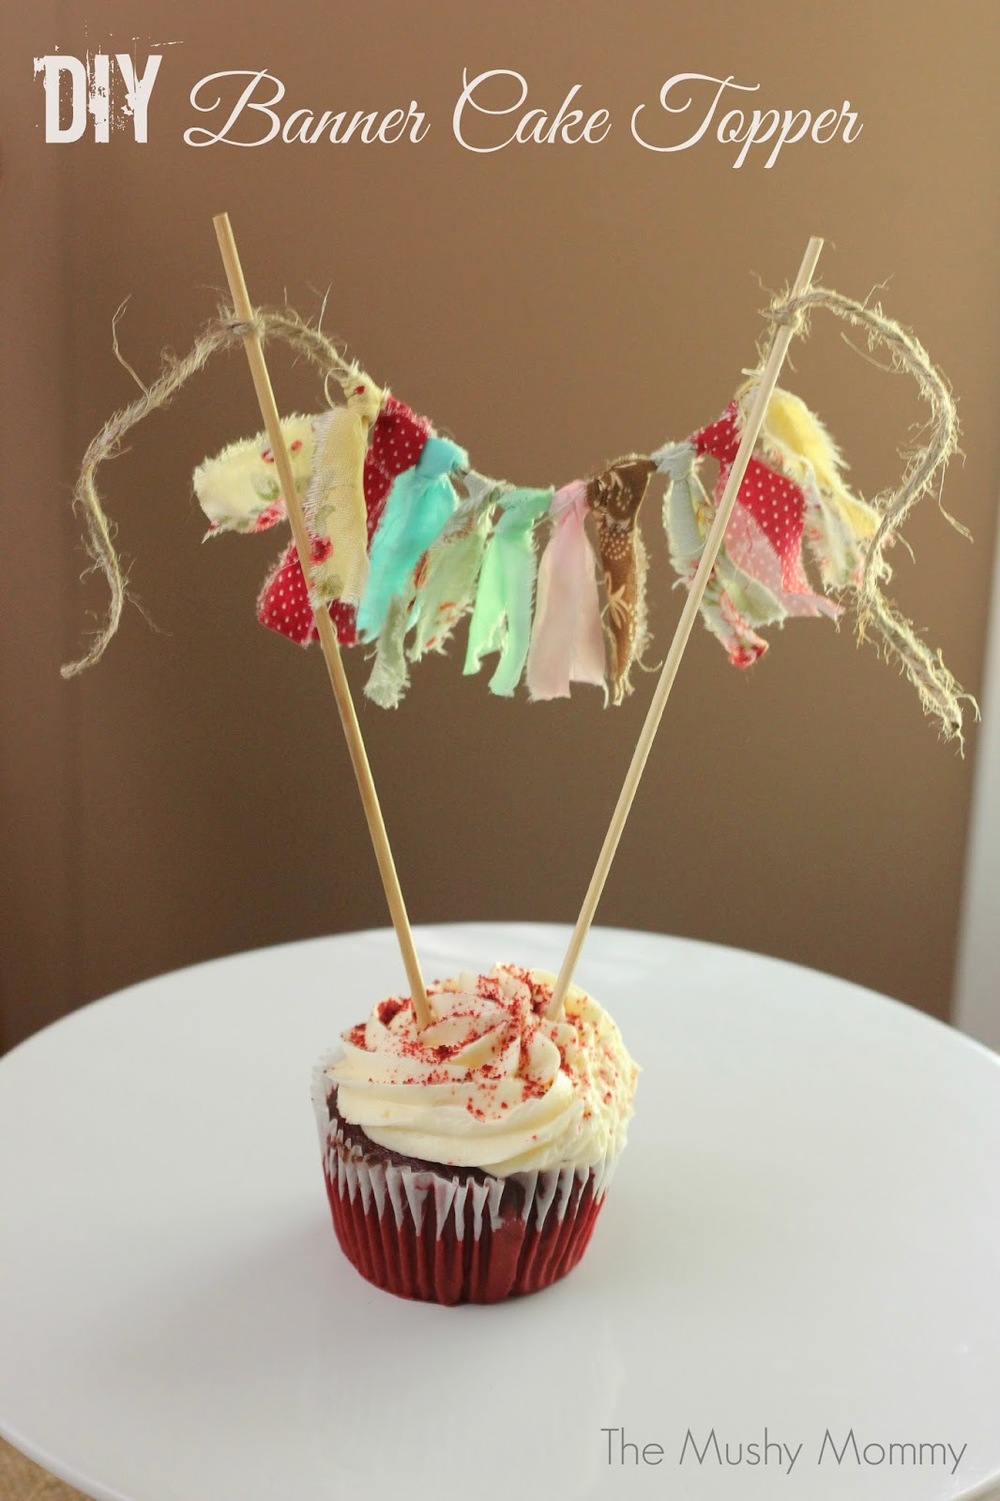
May I present to you the adorable, handmade cake topper that took me about five minutes to make and considering that I already had the supplies it cost me na-da. If you don't have the supplies on hand you just need a few favorite fabrics (very, very little amount of it) and a package of skewers (or shish ka bob sticks as some people call them).

After selecting your fabrics, cut a slit in them and then rip down to the width that you want the pieces to be.
Loop them around your string and pull the loose ends to tighten.
(Some people prefer to cut the fabric rather than rip it)
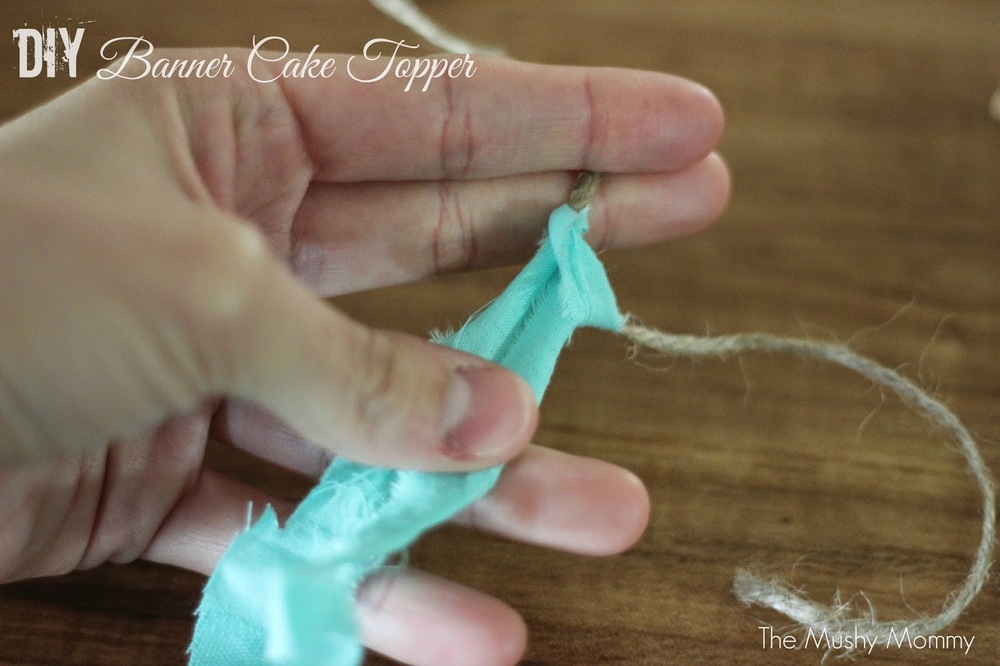
Once pulled tight, the fabric will create a knot around the ribbon or twine of your choice (I chose burlap twine).
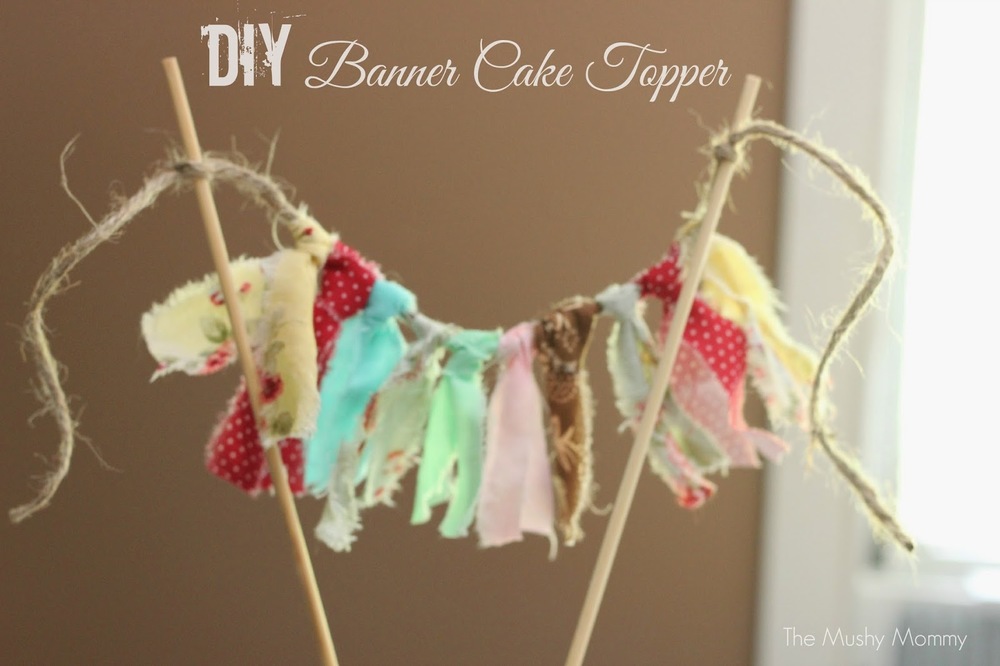
Trim the pieces of fabric to the length desired and tie your free ends of the twine to your skewer sticks. In order for them to stay, they must be tied tightly. Place your skewers in your cake with the ends pointing in towards the center (much closer together than the upper ends should be). This will allow the top to open and allow your banner to be completely exposed. And there you go, people... :)
I look so forward to putting this on Little Bug's cake in two weeks and sharing the photos with you! Now excuse me please, I'm going to eat my cupcake.
Have you ever had a small, crafty accomplishment that left you feeling proud and like a frugal queen?
Thanks for reading, Sasha
